Fun Easter Egg Dyeing
Here are two ways to decorate Easter eggs that will bring joy to your home. First the fizzy egg technique with baking soda and vinegar. Then there’s the cool whip technique that will thrill the kids and tempt little fingers to sample while dyeing eggs. Each technique can be elevated by using glitter.
Ingredients
Fizzy Dye Egg Technique
This method brings a bit of science into our Easter craft, making it even more exciting for the kids. Here’s a quick rundown:
Materials:
- Hard-boiled eggs
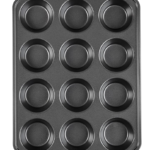
- Small bowls, cups, or a muffin tin
- Baking soda
- Water
- Food coloring
Cool Whip Technique
For those who love a more tactile and visually striking result, the cool whip method is a must-try.
Materials:
- 2 containers (16 oz each) of Cool Whip
- Neon gel food coloring
- Vinegar
- Hard-boiled eggs
Instructions
Fizzy Dye Egg Technique
Instructions:
- Boil your eggs and let them cool in an ice bath.
- In your chosen containers, mix 1 tablespoon of baking soda, 1-2 teaspoons of water, and 2-3 drops of food coloring to create a paste.
- Dry the cooled eggs and roll them in the baking soda mixture.
- Sprinkle about 1/2 teaspoon of vinegar on the eggs and watch the fizzy magic happen.
- Once the fizzing stops, rinse the eggs and dry them.
Cool Whip Technique
Instructions:
- Spread the Cool Whip in a 9×13 baking pan.
- Drop multiple droplets of neon gel food coloring across the Cool Whip, then use a toothpick or knife to create swirls.
- Soak the cooled, boiled eggs in vinegar for about 10-15 minutes.
- Place the eggs in the Cool Whip mixture, rolling them to cover completely.
- Let sit for 20 minutes, then rinse and dry the eggs.
Notes
Elevating the Eggs with Edible Glitter
To truly make our Easter eggs stand out, I decided to add an elegant touch with edible glitter. Here’s how:
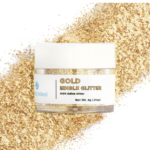
- Choose your desired edible glitter color; I went with gold for that antique look.
- Using a small, wet paintbrush, dip into the glitter (I recommend pouring some into a glass dish to keep it dry).
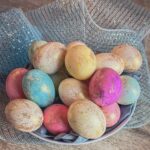
- Gently brush the glitter onto the eggs to achieve a beautiful, marbled effect.


